This is the first of number of posts to come on getting started with jQuery with no previous knowledge of the framework. Over the course, various jQuery Plug-Ins will be used and discussed along with gradual integration with traditional ASP.Net 2.0 web applications components (i.e. Master Pages, User Controls, and ASP.Net AJAX).
A few days ago, I was approached at work to research some of the popular JavaScript frameworks out there. I've looked at a number of different frameworks in the past, and I wasn't too impressed with the complexity and learning curve with them at that time. Well time has passed since then, and I've grown fond of examining what some major companies are using on their web sites. Looking out across the landscape, there's a large number of frameworks out there such as Prototype, Dojo, Spry, and YUI.
Combining this research with my company's request, I began to notice that some of the sites that I frequent use jQuery. The things that appeals the most to me about jQuery was it's small foot print, the number of community based plug-ins that have been created, and the amount of examples and documentation on the web site to get a person up and running in no time. If you spend a little time on the site, you'll begin noticing items like "jQuery for Designers" which makes me think that it should be pretty simple overall. Granted some of the best designers can cut some of the best code, but not too many from my experience. Regardlesss, this seemed like a perfect choice; however, this was partly for work so I needed to dig deeper and do a test run.
For any initial UI research, I tend to try to keep things simple. For such this time, I used Expression Web instead of Visual Studio 2005 or 2008. In order to begin using jQuery for this example, I downloaded the following items:
- jQuery v1.2.6 minimized - link
- jQuery v1.2.6 Uncompressed - link
- Center Element Plug-in (trying to keep CSS compliant) - link
- Rounded Corners Plug-in (for aesthetics) - link
So, I wanted a simple UI with a Header, Navigation, Body, and 3 Footer Columns. Below is the HTML:
1: <body>
2: <div id="container">
3: <div id="header" class="rounded">
4: This is the Header</div>
5: <div id="navigation" class="rounded">
6: This is the Navigation7: </div>
8: 9: <div id="form" class="rounded">
10: <form id="testForm">
11: <input name="btnTest" type="button" value="Show/Hide Header" onclick="toggleHeader();" /><br />
12: <br />
13: <label for="txtName" class="inputLabel">First Name: </label><input name="txtName" type="text" id="txtName" title="Please Enter a First Name" /><br />
14: <label for="txtLastName" class="inputLabel">Last Name :</label><input name="txtLastName" type="text" id="txtLastName" class="textOnly" title="Please Enter a Last Name" /><br />
15: <label for="txtAddress1" class="inputLabel">Address:</label><input name="txtAddress1" type="text" id="txtAddress1" class="addressField" title="Please Enter an Address" /><br />
16: <input name="txtAddress1" type="text" id="txtAddress2" class="addressField" title="Please Enter an Address" /> <br />
17: <input name="btnValidate" type="submit" value="Validate Name" id="btnValidate" />
18: </form>
19: </div>
20: <div id="leftColumn" class="columns">left
21: </div>
22: <div id="centerColumn" class="columns">center
23: </div>
24: <div id="rightColumn" class="columns">right
25: </div>
26: </div>
27: </body>
And now for a little bit of CSS styling...
1: #header {2: color: #FFFFFF;
3: background-color: #800000;
4: margin: 5px 10px 5px 10px;
5: padding-bottom: 36px;
6: height: 75px;
7: } 8: #container {9: height: 750px;
10: background-color: #999999;
11: width: 80%;
12: } 13: #navigation {14: margin: 5px 10px 25px 10px;
15: height: 40px;
16: background-color: #FFFFFF;
17: color: #000000;
18: }19: #form {
20: margin: 10px;
21: padding: 15px;
22: background-color: #800000;
23: color: #FFFFFF;
24: }25: .inputLabel {
26: width: 75px;
27: display: inline;
28: float: left;
29: }30: body {
31: background-color: #999999;
32: } 33: 34: label, input{
35: margin:2px;
36: } 37: 38: label.error {
39: color: black;
40: font-weight: bold;
41: }42: .addressField {
43: width: 175px;
44: } 45: 46: #txtAddress2 47: {48: margin-left: 81px;
49: } 50: 51: #leftColumn {52: color: #FFFFFF;
53: background-color: #800000;
54: padding: 15px 15px 15px 15px;
55: margin: 0px 2px 5px 15px;
56: } 57: #centerColumn {58: color: #800000;
59: background-color: #FFFFFF;
60: 61: padding: 15px 15px 15px 15px;
62: margin: 0px 2px 5px 2px;
63: } 64: #rightColumn {65: color: #FFFFFF;
66: background-color: #800000;
67: padding: 15px 15px 15px 15px;
68: margin: 0px 5px 5px 2px;
69: }70: .columns {
71: width: 32%;
72: height: 300px;
73: display:inline-block;
74: float:left;
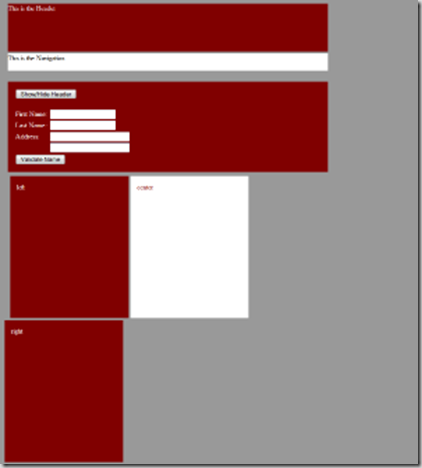
75: } 76: Now that that's done. The page renders something similar to the image below.
Nothing too glamorous. The column/adjacent <div> tags at the bottom wrap to a second line but overall everything is as it should be.
Now it's time to apply some of the UI elements of the jQuery framework. First, let's go ahead and center the container tag. I'm not a fan of the <center> tag so having a jQuery Plug-In to write handle the screen width and centering dynamically takes a lot of time off a task is pretty common.
To use the Center jQuery Plug-In, we first need to reference 3 JavaScript files; jquery-1.2.6.js, jquery.center.js, and our script TestScript.js. For this example, I'm adding the script to the /Scripts/ directory.
1: <script type="text/javascript" language="javascript" src="Scripts/jquery-1.2.6.js"></script>1:2: <script type="text/javascript" language="javascript" src="Scripts/jquery.center.js">1: </script>2: <script type="text/javascript" language="javascript" src="Scripts/TestScript.js"></script>
We have everything that we need to use the Center Plug-in. The only thing we need to do is to write a little JavaScript in our file, TestScript.js. Let's look at the code and I'll dissect next.
1: $(document).ready(function(){
2: $("#container").center({
3: vertical: false
4: }); 5: });There's a number of things going on here but first, a quick jQuery syntax 101 lesson.
The $ function is used to retrieve element(s) from the DOM and to interact with them through the returned jQuery JavaScript Object. Also, the $ function's parameter uses CSS syntax to select the element or elements to manipulate.
On line 2 we see $("#container"). This syntax retrieves the HTML element with the ID of "container". So for line 1, $(document) selects the DOM/JavaScript document object. Again though, this is a jQuery object and not the normal document object that we remember from document.getElementById(...).
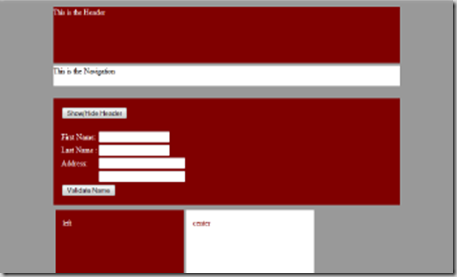
Line 1 sets a new function to be called when the document is ready. Inside that function, we are selecting the tag with the ID of "container". Once we have the jQuery object for the container element, we are calling the center() function. The center() function is an extension to the jQuery object that is provided by the Center jQuery Plug-in. Line 3 is telling the center function to only center the container element horizontally.
Below is the now-centered UI.
The last thing for this initial (and longer) entry will be to implement the rounded corners. I'm not much of a graphics guy (though am learning Expressions Design) so having a simple and effective way to create cross browser compatible corners on the fly is appealing. This really shows where jQuery's $ function is powerful.
To implement the rounded corners code, we need to add the jquery.corners.js file to the HTML page. After that, we just need to add to the code with in the $(document).ready(...) function in our JavaScript file. Below is the updated function.
1: $(document).ready(function(){
2: 3: $("#container").center({
4: vertical: false
5: }); 6: 7: $(".rounded").corners("20px");
8: $(".columns").corners("top 20px");
9: });We have only added lines 7 and 8. We are first selecting all elements associated with the CSS classes rounded and columns. Next we are calling the corners() function that also extends the jQuery object returned by the $ function. This function will generate the rounded corners for us based on the parameters we pass it. On Line 7, we are passing "20px" to say that we want the vertical and horizontal radii to be 20px each. Line 8 does the same thing; however, we have signified we only want the top two corners to be rounded.
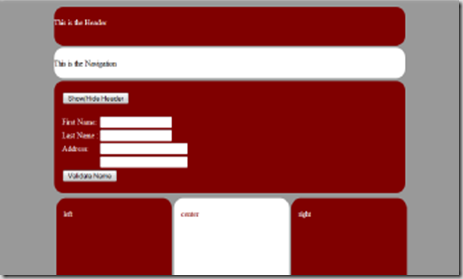
Below is the rounded UI.
The rounding of the corners removed some of the line breaks and truly polished up the UI. So, from 9 lines of JavaScript, we have took a very rough looking UI and converted it into a semi-professional looking template for us to build off of.
The next post on the series will a small bug that I discovered while playing around with this and how I managed to fix it. Afterwards we'll be looking at a simple post of showing and hiding the header (just for kicks).
Additional Resources:


Thanks! Nice little tutorial, just enough to get me started with jQuery :)
ReplyDeleteThanks for the article. I'm looking forward to the rest of your series.
ReplyDeleteA nice taste of what jQuery offers. I can't wait to see what you come up with next.
ReplyDeleteThanks! Nice little tutorial, just enough to get me started
ReplyDelete